Showing posts with label DIY. Show all posts

HIP HOP Hooray

Saturday, May 11, 2013
I can't believe how fast the years fly by.  The Cutie Patootie recently turned 7!!!
This year she had a HIP HOP party at her dance studio.  The girls loved it and had a blast learning some new moves.  

Here are a few of the cute details:

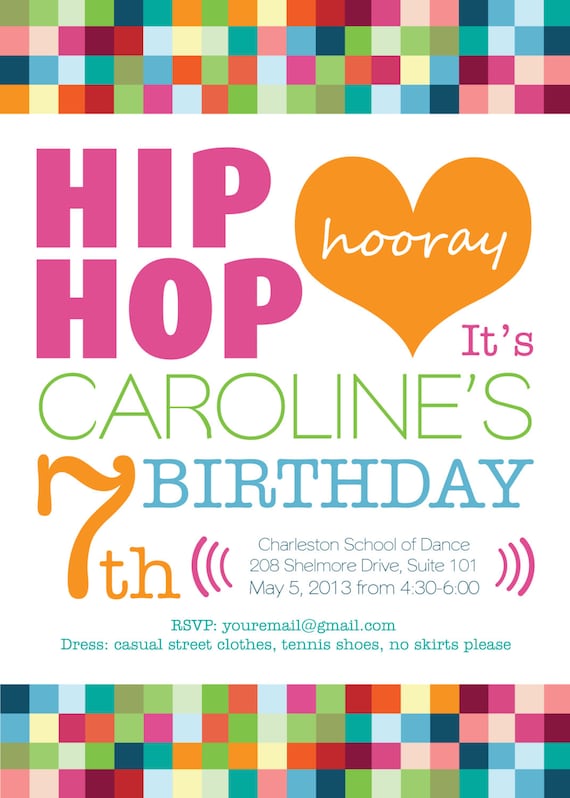
THE INVITATION:  As usual, Jane from BugLuv via Etsy created these adorable custom invitations for us.  
Printable or Emailable Girls Hip Hop Dance Birthday Party Invitation
Find this invite at BugLuv's Etsy Shop HERE.


THE PARTY: The girls were taught a Hip Hop routine and then performed it to all of us at the end.  Pretty impressive for a short class!


THE HIP HOP POPS:  These were a fun play on the traditional cupcakes or cake.  Cake pops are typically 
quite a process to make, but with a little research I found the easiest and most time efficient way to make them was by using the cake pop baking tray made by Nordic Ware . I found it at our local HEB.  (Target, Hobby Lobby and Michaels carry it as well.)  You can also find the cute cake pop tags at BugLuv.


I used these 'how to make fool proof cake pops' tips from HOMEMAKER CHIC.  Great tutorial!!!


THE FAVORS:  BugLuv created this coordinating CD case cover.  The girls were given a track of a few hip hop songs, including the one that they learned there routine too.  C thought this was totally cool.  


THE BIRTHDAY GIRL:

There you have it!

With whimsy~


Starbucks Teacher Gift

Tuesday, May 29, 2012
Tomorrow is the Cutie Patootie's last day of Kindergarten!!  I can't seem to wrap my head around it.  This year has flown by!!  C has learned SO much, and she is SO excited to be a big time first grader next year.

C loved her teacher this year, so for a last day teacher gift she is bringing her a Starbucks gift card wrapped in this creative way:
Starbucks teacher gift card coffee cup thank you printable
I love this FREE printable by alphamom.  Just print, hand write your teacher's name and check the order boxes with a permanent marker,  and wrap around the smallest size Starbucks cup.  (starbucks will happily give you an empty cup when purchasing your gift card.)
I did add a bright red ribbon to the cup to give it a fun pop of color. 

Starbucks teacher gift card coffee cup thank you printable
image and free printable from alphamom

Starbucks teacher gift card coffee cup thank you printable

With whimsy~


Etsy Love: Wishing Tree Tags

Tuesday, March 6, 2012
One reason I LOVE Etsy is for the wide range of charming products created by talented designers at affordable prices. Also, most all of the designers on Etsy are willing to work with you to get that extra special and custom piece that you are struggling to find elsewhere.

For those of you that are in the midst of planning a baby shower, sip and see, or Christening party a unique substitute to the ordinary guest book is to create a whimsical wishing tree.

The wishing tree can easily be created by branches arranged in a vase. (You can find beautiful branch options at your local craft/floral store.  These days, even grocery stores have great options.  Central Market has a fabulous floral department.). 
Once filled out by your guests the wishing tags or cards can be attached to the branches.  This makes for a great statement decor piece at the shower and guests will love reading all of the cheerful messages left for the new parents and their little bundle.
These cards make a perfect keepsake for you to cherish for years to come.

Below are some of my favorite wishing cards discovered on Etsy:

Wishes for Baby Cards - Unique Baby Shower Activity Game or Memory Book Idea - Set of 60

cards and image from ErinsArtwork via Etsy


image and tag from ElbLDesigns via Etsy
Baby Shower Wish Tree Tags - Bird Nest with Blue Eggs - New Beginnings - Set fo 12
image and tags from Shabby Pea Designs via Etsy

Set of 12 Wishing Tree Tags- Baby Owl With Green String - Baby or Bridal Shower
image and wishing tree tags from queen of paper cards via etsy


Peter Rabbit Baby Shower Wish Cards Neutral Boy or Girl
image and wish cards from SeasonalDelights via Etsy

Wish or Advice Cards  - Baby Shower - pack of 12 - Any Design
image and wish cards from mavoracards via Etsy


Display Inspiration:

Image Detail
image from here
image from here
image from here

image from here


A fun alternative to the wishing tree is to display the cards on a line with clothespins.  Perfect for a spring/summer shower.
baby shower wish cards hanging from string
image from here


With whimsy~


Roses are Red, Celery is Green

Tuesday, February 14, 2012
Happy Valentine's Day!
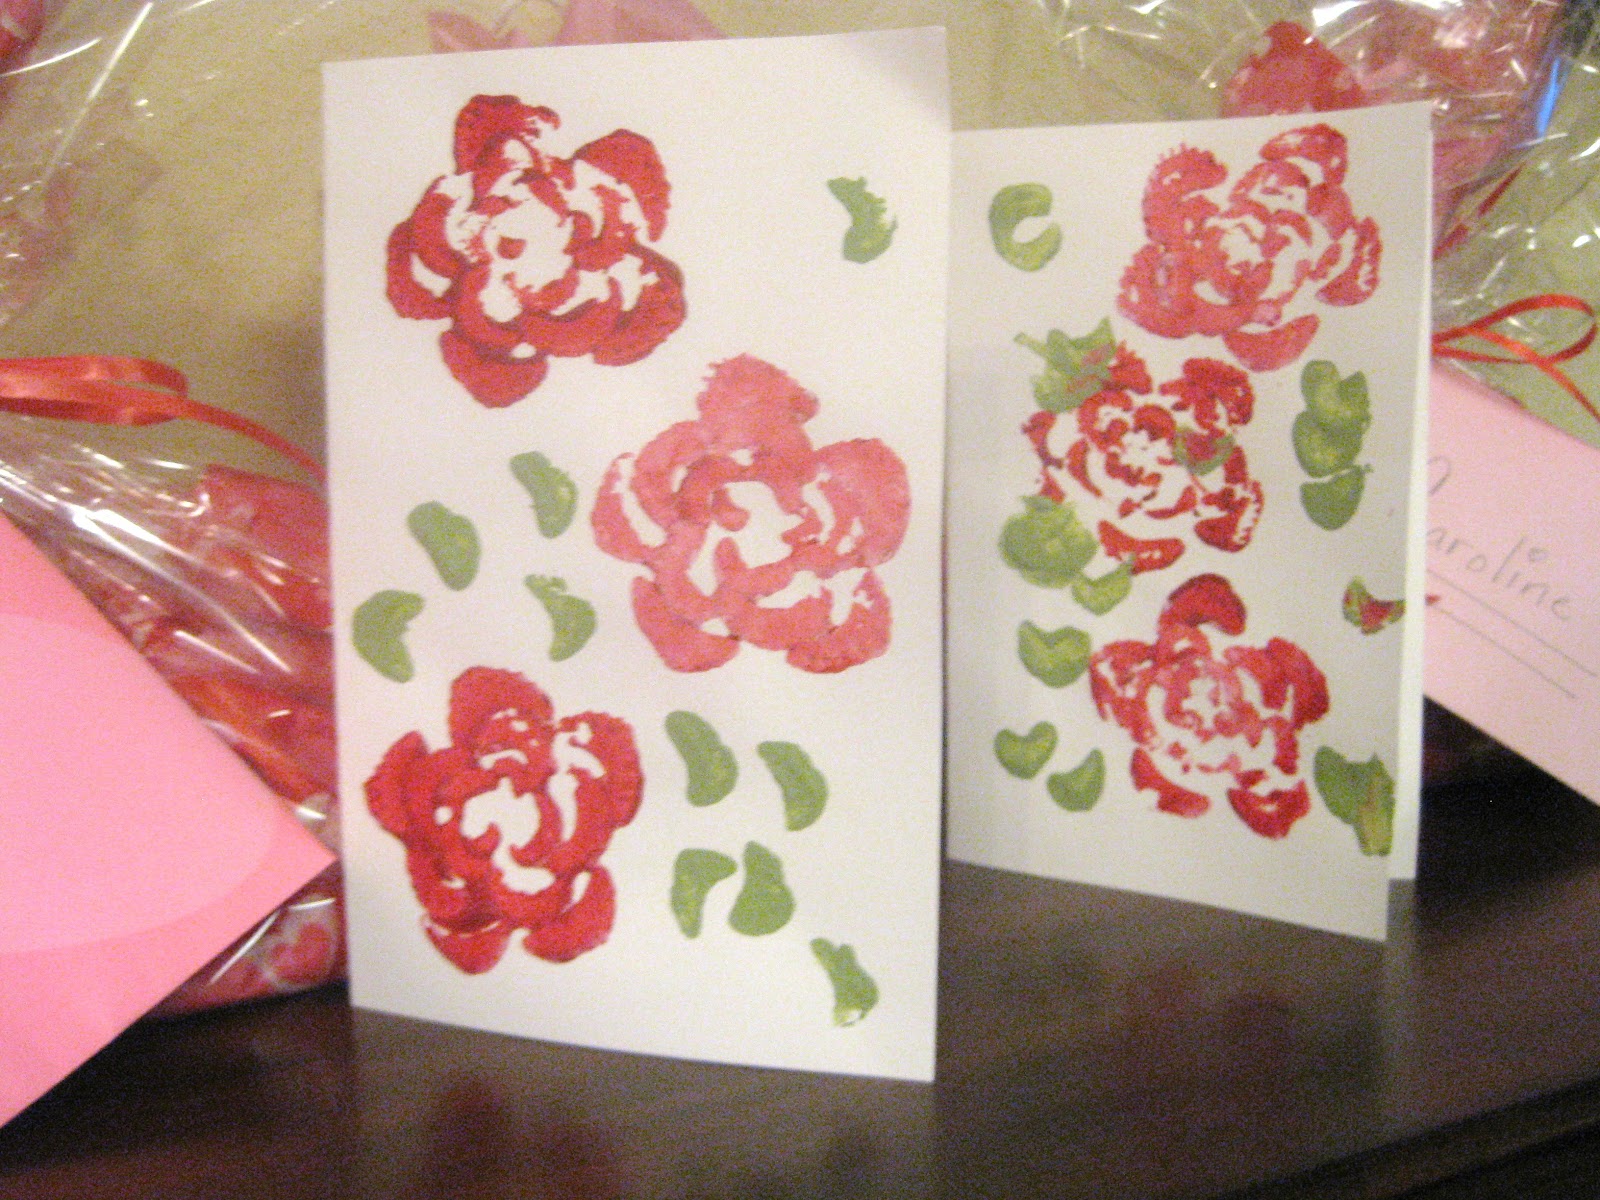
The kids recently made these cards for their Grandparents.  The roses were created by using celery    
as a stamp.
They were so easy to create and turned out great,
Click HERE for an easy tutorial.
 Inside the card the Cutie Patootie wrote a clever little poem for GG and Pops.

M's card also had a fun Valentine poem inside. 
His read:

I love you,
and you love me.
Let's share a snack
of celery!

with whimsy~


Creative Valentine Ideas & Freebies

Friday, February 3, 2012
I just wanted to share a few of my favorite Valentine Finds and Freebies!
Enjoy!


image and FREE printable from dandee designs


image and FREE printable from the crafting chicks


image and FREE printable from it is what it is


Image from the teacher wife


image from here


valentines
image and tutorial from HERE

massvalentines_poprocks
image from here


SO doing this for Valentines this year. Landon can hand give them to all his little friends and it's the perfect snack for 2 year olds.
image from here


On-a-Roll Scroll
image from here

With whimsy~


100th Day of School

Tuesday, January 31, 2012
Today is the Cutie Patootie's 100th Day of Kindergarten!!!
Her homework assignment was to decorate a t shirt in honor of this special day.

C's favorite color is red so she wanted to decorate the shirt with hearts.  Good thing Valentine's day is around the corner!  
There are 100 sparkling hearts on this shirt, count them!

For the front I just cut out a simple heart stencil (made from construction paper).  I then taped the stencil to the front of the shirt.  C had fun filling it in with all of the hearts.  We did use dollops of fabric glue to help the hearts stay in place.  That way the foam stickers wouldn't just fall of through out the day.
On the back of the shirt I wanted to reference the 100 days along with the 'love'ly hearts all over the front. 

C loved how it turned out.   I can't wait to hear how this fun day went!


With whimsy~


Snowman Soup

Tuesday, December 20, 2011
It's official... the kids are out of school until the new year!
I assembled these cute Snowman Soup Kits for the Cutie Patootie's classmates.
A clever twist to an ordinary hot cocoa packet.

 What's inside the bag?
hot cocoa packet, candy cane, hershey kisses (plain and caramel), mini marshmallows, a fun swirly candy cane straw (found at Hobby Lobby)
 The Poem:

With whimsy~


J is for Jesus

Thursday, December 15, 2011
This sweet little treat is the perfect way to spread Christmas cheer to a large group. It's perfect for class gifts, playgroups, etc.  The poem makes it more meaningful and creative than a regular old candy cane.


Materials needed:
Paper
scissors
glue stick
hole punch
mini candy canes
ribbon


The Poem:

J is for Jesus
The candy cane 
turned upside down
is the letter J.
To remind us of
baby Jesus,
born on Christmas day.


With whimsy~


Tinkerbell & Pirate

Tuesday, November 1, 2011
Hope everyone had a fun-filled and spooky Halloween!  We sure did!

As you can see, my little ones dressed up as Tinkerbell and a Pirate!  I created both costumes, semi-homemade style, and wanted to share with you all a few easy tutorials and tips that I used during the creation process.

Tinkerbell:

As with any design I typically start with a sketch of the costume that I am envisioning and then go from there.  I don't like to work with sewing patterns, I love winging it and creating my own unique costumes.

The concept sketch:

From the sketch I gather my materials and get to work.

Items needed to complete this Semi-homemade costume:
  • LOTS of tulle .  (You can normally find small rolls of tulle in a variety of colors at the craft store in the ribbon section.  This way you don't have to buy it by the yard.  I used 3 spools of tulle for this particular costume.
  • ribbon (3-4 yds )
  • any lime green type of fabric (1/2 yd) (I used satin) 
  • white felt (for the backs of the petals) (1/2 yd)
  • green thread
Tutu Dress:  the tulle portion of the dress is a no sew so tutu that is extra extra long.  I tied it around chest instead of around the waist.  In addition, I tied and extra portion of ribbon in the middle of the tutu to be used as a halter style tie around the next.  check out this no sew tutu tutorial.

Petal Sash:  an apron style sash that ties over the tulle dress around the waist.  (The sash helps cinch in the tulle dress.) *each petal is roughly 8" wide and 12 " long.


 Tinkerbell shoes:

Click HERE for an easy tutorial!

Tinkerbell's hair:

I styled C's hair into a gigantic bun, she has a ton or beautiful hair so it was remarkably easy to do with the help of a few Bobbi pins and hairspray.

The flower in her hair was found at Michael's in the floral/ holiday section.  (It already came without the stem and a floral clip already attached. )  the flower itself was wire rimmed making it really easy to shape around her head.

Tinkerbell wings:

I found these in Target's Halloween costume section.  They were inexpensive and the perfect color. 
I couldn't pass them up.


Pirate Costume:

The concept sketch:
Material needed:

  • white tshirt
  • black pants (I found mine at target for 5$)
  • black tshirt
  • red craft paint (optional)
  • scissors
  • white craft paint
  • fabric for sash (1/8 yd.)
  • black felt
  • black elastic for eye patch

Red/White striped T:  I could not find a red/white striped T anywhere so I just grabbed a bottle of red fabric paint from the craft store and painted them on a plain white tshirt.

Pants: I found these at Target for $5.  I simply cuts them 2-3" shorter and then cut a zig zag pattern around the cuff

Black vest:  I cut the neck and arms off of an inexpensive black Tshirt.  Then cut straight down the front to create the opening. I also fringed the bottom of the vest with scissors.  I then free handed a skull and cross onto the back of the vest with white craft paint.  *Tip* Buy the Tshirt for the vest a couple sizes bigger than your child's normal size, it will fit over their undershirt better and look more 'vest like'

Sash: any coordinating fabric will do. (1/8 yd). no sewing necessary, just tie around waist

Eye patch:  created with black felt and elastic


Pirate hat:

I used this easy TUTORIAL to create the pirate hat.

Arrrrgh!


The kids loved how their costumes turned out, and so did I!!!

with whimsy~


Tinkerbell shoes

Friday, October 21, 2011
This year, the Cutie Patootie decided that she wants to be Tinkerbell for Halloween.  I enjoy making the kids' costumes rather than buying them.  (Ok, Ok, I do buy some of the components to the costumes, so my costumes are really semi-homemade...)

Here is a peek at C's Tinkerbell costume.  These shoes are a great example of my semi-homemade costume concept.


Items needed:
  • Old Shoes (ballet flats or similar style)
  • Craft paint (Color of glitter)
  • paint brush
  • Glitter  (This project took 1 1/2 tubes of glitter) 
  • Mod Podge (Dries clear / better option than glue)
  • Hot Glue
  • Large Pom Poms (found in craft store / normally in a pack of 4)

Directions:
  1. Wipe old shoes clean with a damp cloth / stuff shoes with newspaper or plastic shopping bags. (this keeps the inside of the shoes clean and glitter free)
  2. Paint body of shoes with craft paint, let dry completely
  3. Paint on Mod Podge and Sprinkle with Glitter . (It is easier to do this process one small section at a time.  (Toe/Side/Back/Side)  This way the mod podge doesn't dry up before covering it. s
  4. Let dry completely
  5. Hot glue pom poms to the toes of the shoes.

There you have it!

Since I already had the old shoes, mod podge, and craft paint laying around this project only cost a couple of dollars for the glitter and pom poms.

Pretty good for a two dollar transformation don't you think?!

With whimsy~


Comfy Closets

Thursday, October 6, 2011
I love creative use of space!  Check out these creative closet designs.  

1. Crib in a Closet
closet03 Put Baby in the Closet: 15 Lovely Converted Closet Nurseries
image from here


image from here


2. Reading Nook
closet10 Put Baby in the Closet: 15 Lovely Converted Closet Nurseries
image from here


3. Changing Table
image from here

with whimsy~