Candy Cane Mice

Monday, December 19, 2011
Twas the night before Christmas, when all through the house
Not a creature was stirring, not even a mouse.


A dear friend of mine created these adorable Christmas Candy Cane Mice for her daughter's Kindergarten classmates.  Soooooo CUTE, right?

Click here for an easy step by step tutorial.

Thanks for sharing, Amy!

With whimsy~


Away in a manger

Friday, December 16, 2011

This Christmas craft  is great for all ages.  Easy enough for tiny hands but still fun for grade school kids . Enjoy!!!


materials needed:
construction paper 
glue
raffia (or other material for straw)
Popsicle sticks
felt (1"x2" square)
crayon 

with whimsy~


J is for Jesus

Thursday, December 15, 2011
This sweet little treat is the perfect way to spread Christmas cheer to a large group. It's perfect for class gifts, playgroups, etc.  The poem makes it more meaningful and creative than a regular old candy cane.


Materials needed:
Paper
scissors
glue stick
hole punch
mini candy canes
ribbon


The Poem:

J is for Jesus
The candy cane 
turned upside down
is the letter J.
To remind us of
baby Jesus,
born on Christmas day.


With whimsy~


Cinnamon Sugar Snowflakes

Monday, December 12, 2011
What's crispy, warm, buttery, and festive with cinnamon sugar all over?  
Why cinnamon sugar snowflakes, of course!


1. Fold flour tortilla into 1/4

2. snip around the edges 

3. Voila!

4. brush on melted butter

5. sprinkle with cinnamon sugar, sprinkles, etc.


6. Bake at 375 for 5-7 min. (or until cinnamon sugar is bubbly)


M insisted his snowflake was a dinosaur mask... Rarrrrrrr!


They were a hit!


With whimsy~


Nativity Craft

Tuesday, December 6, 2011
The Cutie Patootie just finished working on this adorable Christmas craft.  While making the craft we talked about the the story of Christmas and the importance of Jesus' Birthday.  

Mary, Joseph and baby Jesus

Materials Needed:
Toilet paper Rolls- 2
Construction paper
fabric
yarn
tape

Directions:

Mary and Joseph:
wrap toilet paper roll with construction paper
cut out a circle and color or draw face (we used a 2" circle die cut)
attach face to top portion of paper roll
tie the fabric swatch to top of the roll with string

baby Jesus:
roll a piece of construction paper into a small tube. (secure with tape)
add face.
wrap with fabric and tie with yarn

What's next?  
We plan on making the three wise men to add to C's nativity.


With whimsy~


Custom La Ballerinas: 3

Monday, December 5, 2011
They're back!
My little 'La Ballerinas' have been customized again!


Bright, cheery and full of whimsy these ballerinas were inspired by Pottery Barn Kids' Brooke Bedding collection.

Sham


To see the original 'La Ballerinas' paintings click here.

Want to see other 'La Ballerinas' CUSTOM orders?
Click HERE & HERE.

To order your own set of 'La Ballerinas' paintings for your tiny dancer email me HERE for a price quote!

With whimsy~


FREE Christmas Printables

Thursday, December 1, 2011
Here are a few of my favorite and FREE Christmas printables this year:

1. Advent Calender
Free Party Printable Christmas Advent Calendars
Freebie via Living Locurto

Freebie via Tip junkie


4. Gift Tags
freebie via whisker graphics

DesignEditorSkunkling
image via design editor

5. Reindeer Food Label:

freebie via TomKat Studio

6. For Santa:
freebie via the sweet spot candy bar


With whimsy~


Holiday Canvas

Tuesday, November 29, 2011
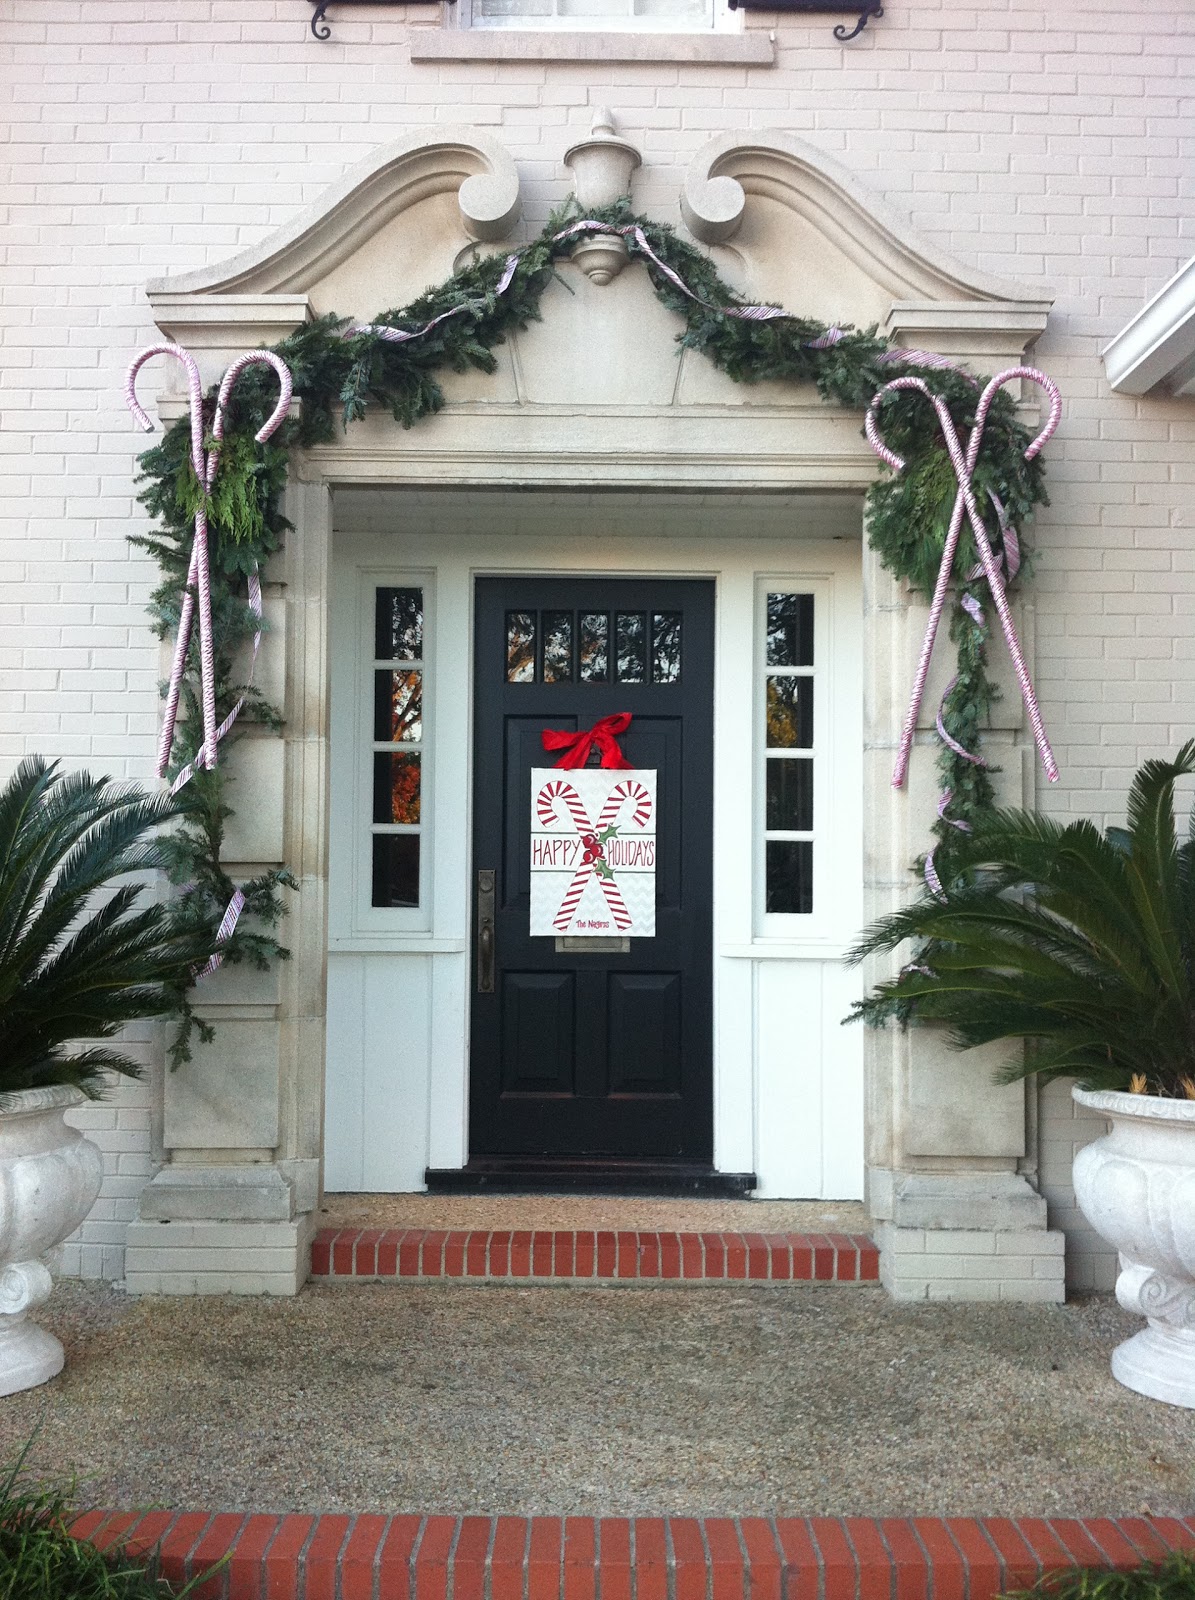
I LOVE it when my customers send me photos of my paintings.  Here is a look at a recent custom holiday door canvas I created:

(Thank you, N, for sharing your beautiful photo!)

Click HERE to see more details on this custom Happy Holidays door canvas.

Door Canvases are a great and creative alternative to the traditional wreath.

My custom door canvases come in a variety of sizes and are perfect for any occasion:
Birth Announcements
Special Events

Contact me here to get started on your custom door canvas!


With whimsy~


Cranberry Salsa

Monday, November 28, 2011
Hope everyone had a wonderful Thanksgiving!

I wanted to share a recipe that I shared with my family over the break.


I originally discovered this recipe from, where else, Pinterest via Jamie Cooks it Up.
Want to make it?


Ingredients:
1 12 oz. package of fresh cranberries
1/4 c. green onion , chopped
1/4 c. cilantro, chopped
1-2 jalapeno peppers
1/2 c. sugar
1/2 t cumin
2 limes, juiced
dash of salt
2 8oz. package of cream cheese (optional)

Directions:
  • Add fresh cranberries, green onion, cilantro, jalapenos, sugar, cumin, salt, lime juice to food processor and PULSE until desired consistency.
  • Refrigerate in an air tight container for at least 4 hours.
  • Optional:  Spread cream cheese in shallow serving dish and pour salsa over the top.
  • Serve with wheat thins or pita chips


*tips and tweaks*  

you may notice that my ingredients and their amounts may vary slightly from Jamie's original ingredient list.  

  • Sugar: Jamie's recipe calls for 1 1/4 c.  I actually made mine with only 1 c. (it was still too sweet). The next time I make this I plan on adding only 1/2 c.  ......  the sugar breaks down the cranberries the more it sits. I actually made this salsa one day in advance.  It traveled well!
  • Jalapeno:  Jamie's recipe only calls for 1 small jalapeno.  I like a little more heat, and with all of the sugar the heat was lost. The next time I make this I plan on adding 2 small jalapenos (with out their seeds, of course. )
  • Lime vs. Lemon:  Being a Texan it only makes sense to add Lime juice vs. Jamie's suggested Lemon. (Either would work, I  just prefer the lime)
  • Crackers vs. Chips:  What to serve with this salsa?  If you plan to layer the salsa over cream cheese I would serve this with a wheat cracker (wheat thins) or a pita chip.  If you plan on serving the salsa by itself a traditional tortilla chip would be tasty.

I love this recipe!  The cranberries add a fun and festive twist to traditional salsa.  

With whimsy~


Canvas Christmas Card Organizers

Monday, November 21, 2011
Available NOW in my Etsy shop are these festive canvas Christmas card organizers.


For the...

Merry Christmas Chevron design click HERE

Joy Trellis design click HERE


With whimsy~

Mama Like: the-go-anywhere-high-chair

Friday, November 18, 2011
 OK, Seriously.... 
WHERE WAS THIS PRODUCT WHEN I HAD TEENY TINY BABIES?!

I love this!

How convenient is this portable highchair by Ciao! Baby? It folds up just as easy as those portable chairs we drag out to our kids soccer games. :)
It's light weight, PERFECT for travel, convenient, easy to carry, great for outdoor activities, the list goes on.


image from Ciao Baby

image from Ciao! Baby

image from Ciao!Baby

image from Ciao! Baby

This chair is not yet available in stores, but will be for sale January 2012...... they are accepting pre-orders now, though! Click here

At $67.99 this chair is priced a little steep, but you absolutely cannot beat the convenience factor and its easy portability, especially those of you who travel often, or spend a lot of time outdoors.

If my kiddos were younger I would definitely be purchasing this puppy. :)


With whimsy~


Happy Holidays Door Canvas

Thursday, November 17, 2011
Details:
Custom Holiday door canvas
size: 18x24
materials: acrylic on gallery wrapped canvas,  clear matte interior/ exterior varnish, 4" wired rimmed ribbon.
Extras:  metallic chevron accent.


It's not too late to get your Holiday order in!  Contact me here to get started on your custom order today!


Happy Holidays!

With whimsy~

Pumpkin Dump Cake

Thursday, November 3, 2011
Halloween night was filled with friends, trick or treating, and pumpkin dump cake.
Pinned Image

A dear friend of mine sent me a link to this recipe from Cookies and Cups, shortly thereafter I started to see it plastered all over Pinterest.

So, obviously, I had to see what all the hype was about.

Let me tell you...... it was super easy to make and delicious!

Click HERE for the recipe.

This recipe is a keeper!


With whimsy~

Tinkerbell & Pirate

Tuesday, November 1, 2011
Hope everyone had a fun-filled and spooky Halloween!  We sure did!

As you can see, my little ones dressed up as Tinkerbell and a Pirate!  I created both costumes, semi-homemade style, and wanted to share with you all a few easy tutorials and tips that I used during the creation process.

Tinkerbell:

As with any design I typically start with a sketch of the costume that I am envisioning and then go from there.  I don't like to work with sewing patterns, I love winging it and creating my own unique costumes.

The concept sketch:

From the sketch I gather my materials and get to work.

Items needed to complete this Semi-homemade costume:
  • LOTS of tulle .  (You can normally find small rolls of tulle in a variety of colors at the craft store in the ribbon section.  This way you don't have to buy it by the yard.  I used 3 spools of tulle for this particular costume.
  • ribbon (3-4 yds )
  • any lime green type of fabric (1/2 yd) (I used satin) 
  • white felt (for the backs of the petals) (1/2 yd)
  • green thread
Tutu Dress:  the tulle portion of the dress is a no sew so tutu that is extra extra long.  I tied it around chest instead of around the waist.  In addition, I tied and extra portion of ribbon in the middle of the tutu to be used as a halter style tie around the next.  check out this no sew tutu tutorial.

Petal Sash:  an apron style sash that ties over the tulle dress around the waist.  (The sash helps cinch in the tulle dress.) *each petal is roughly 8" wide and 12 " long.


 Tinkerbell shoes:

Click HERE for an easy tutorial!

Tinkerbell's hair:

I styled C's hair into a gigantic bun, she has a ton or beautiful hair so it was remarkably easy to do with the help of a few Bobbi pins and hairspray.

The flower in her hair was found at Michael's in the floral/ holiday section.  (It already came without the stem and a floral clip already attached. )  the flower itself was wire rimmed making it really easy to shape around her head.

Tinkerbell wings:

I found these in Target's Halloween costume section.  They were inexpensive and the perfect color. 
I couldn't pass them up.


Pirate Costume:

The concept sketch:
Material needed:

  • white tshirt
  • black pants (I found mine at target for 5$)
  • black tshirt
  • red craft paint (optional)
  • scissors
  • white craft paint
  • fabric for sash (1/8 yd.)
  • black felt
  • black elastic for eye patch

Red/White striped T:  I could not find a red/white striped T anywhere so I just grabbed a bottle of red fabric paint from the craft store and painted them on a plain white tshirt.

Pants: I found these at Target for $5.  I simply cuts them 2-3" shorter and then cut a zig zag pattern around the cuff

Black vest:  I cut the neck and arms off of an inexpensive black Tshirt.  Then cut straight down the front to create the opening. I also fringed the bottom of the vest with scissors.  I then free handed a skull and cross onto the back of the vest with white craft paint.  *Tip* Buy the Tshirt for the vest a couple sizes bigger than your child's normal size, it will fit over their undershirt better and look more 'vest like'

Sash: any coordinating fabric will do. (1/8 yd). no sewing necessary, just tie around waist

Eye patch:  created with black felt and elastic


Pirate hat:

I used this easy TUTORIAL to create the pirate hat.

Arrrrgh!


The kids loved how their costumes turned out, and so did I!!!

with whimsy~